Week 10: Molding and Casting
Designing the object
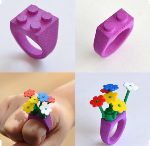 On Pinterest I found this great Lego ring and first I thought of making it. Then I thought of how my son allways falls holes in his trousers and wouldn't it be nice to have a lego sew on patch. So he can wear his own Lego design. As wearing Lego on your knees can be quite painfull if you fall, I might sow it on his hoody or his cap. And off course I'll make one for my daughter too.
Designing it in Fusion 360
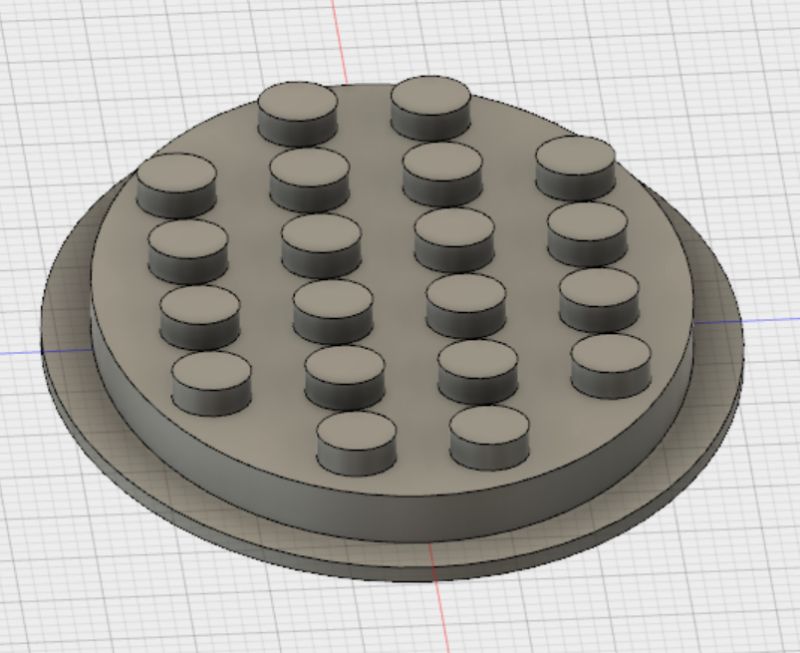
My design is based on this great tutorial. Because I had so much trouble designing my dresser in the 'make something big' week, I took care to be very precise on making a new sketch and forming new bodies. I named all my new bodies and sketches. I also learned that if you make a sketch on a plane of a body and extrude it, Fusion makes a feature of it. A feature you can find in your timeline at the bottom of your window. If you want to make a pattern with it, you can select 'from feature'and then select the feature in your timeline. This would have saved me some trouble in my dresser-design, I think. This is the workflow I used for my design in Fusion 360:
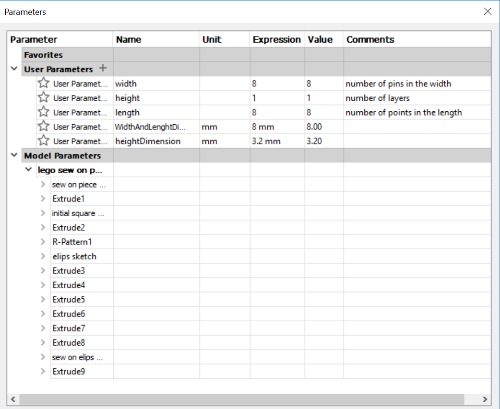
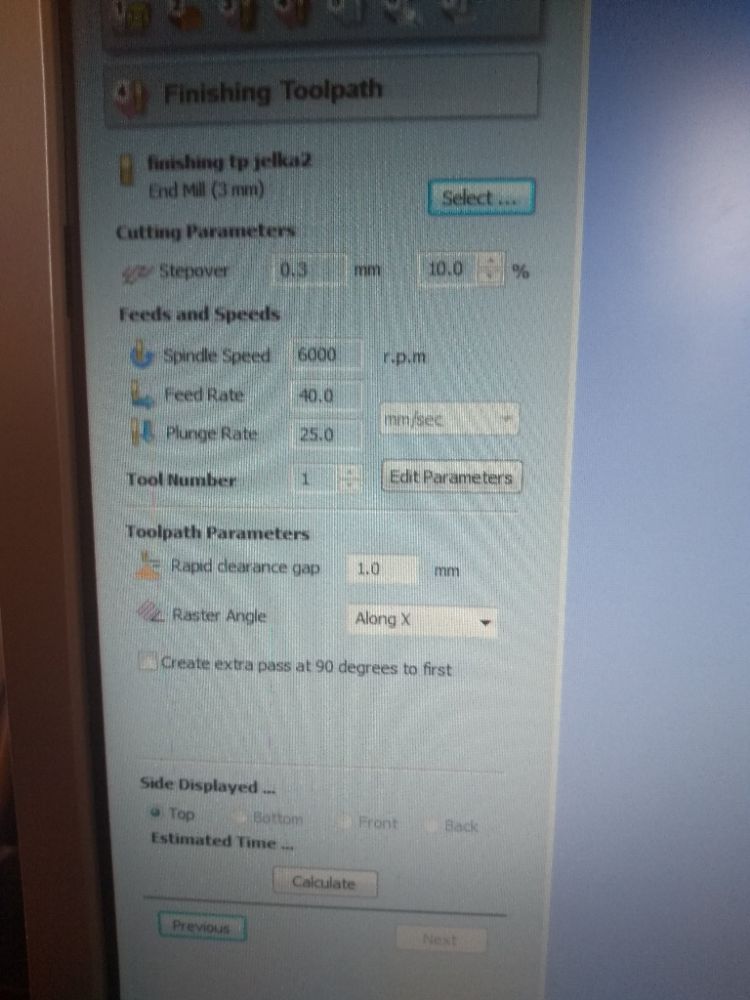
- Fill in the parameters as shown in the picture. This way you can allway adjust the size of your lego patch and the number of pins changes along.
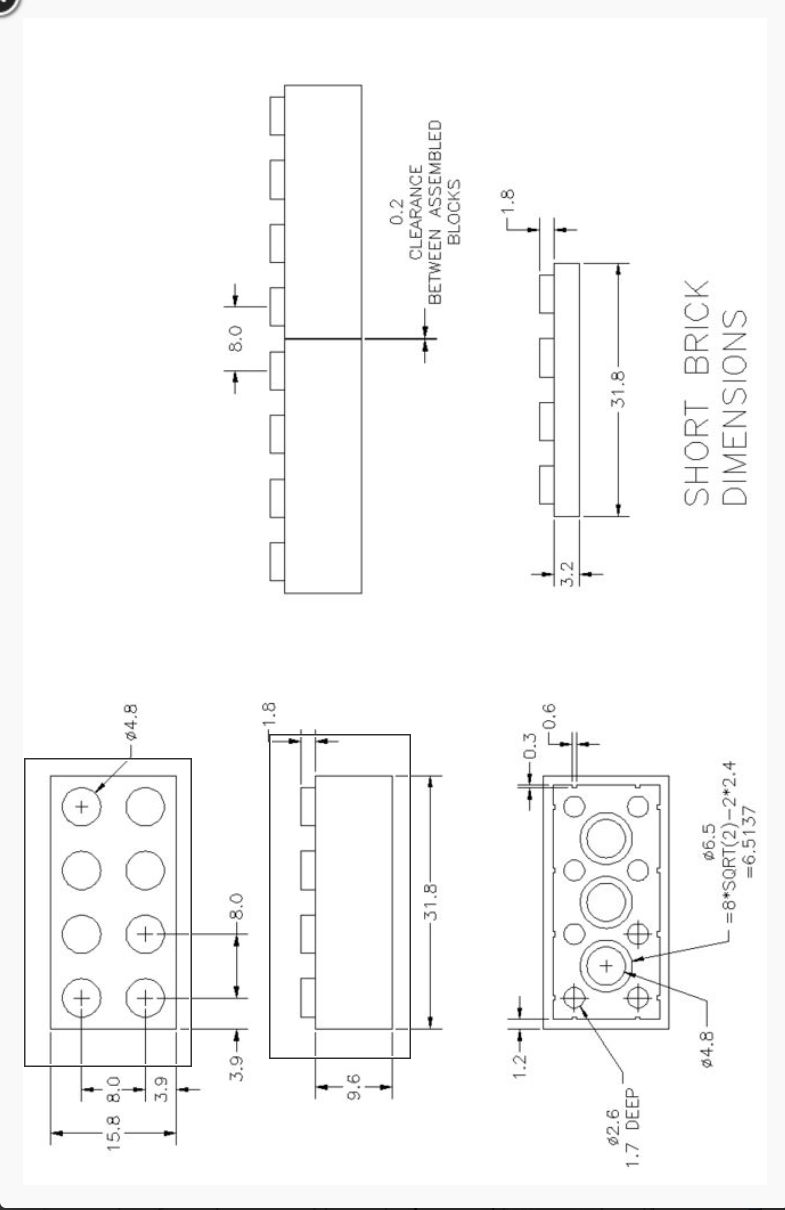
- Create a new sketc and draw a rectangular. Set the length and width as follows:
length*widthandlengthdimensionandwidth*widthandlengthdimension - Stop the sketch and extrude to
height*hieghtdimension3.2 mm. Name the body. - Create a new Sketch. Select the upper plane of the brick. Draw a cirkel with a diameter of 4,8 mm
- Constrain it to 3.9 mm from both perpendicular edges of the brick.
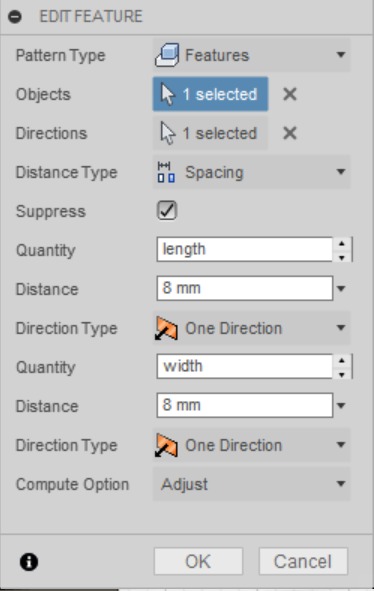
- Create - Pattern - Rectangular Pattern. Fill in a seen in the picture.
- Create a new skecth on the bottom plane. Draw any shape you want the patch to be in. I choose an elips. Stop the sketch.
- Extrude the sketch to the total height of the lego brick and name the body.
- Create - Boundary Fill. For Tools, select the square Lego brick and the shape of the patch. For Cells, select the combined shape. Choose 'New Body'. Click OK and name your body.
- Now you need a layer that can be sewed on. Create a new sketch on the bottom plane of your patch. Draw a form with an 3 mm offset of your patch. Stop your sketch.
- Extrude this last sketch to 1 mm. Choose Operation: join. And Fusion 360 will automatically join this with your last body.
- Now right click your latest body in the browser on the left and choose 'save as STL'. This is the file to use with the CNC machine.
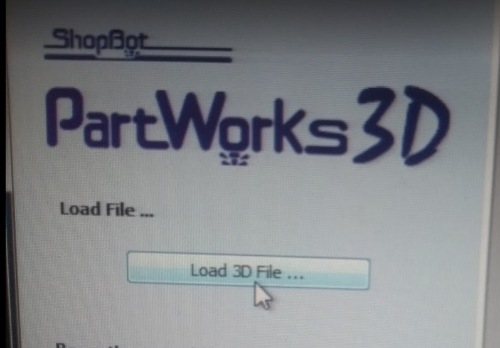
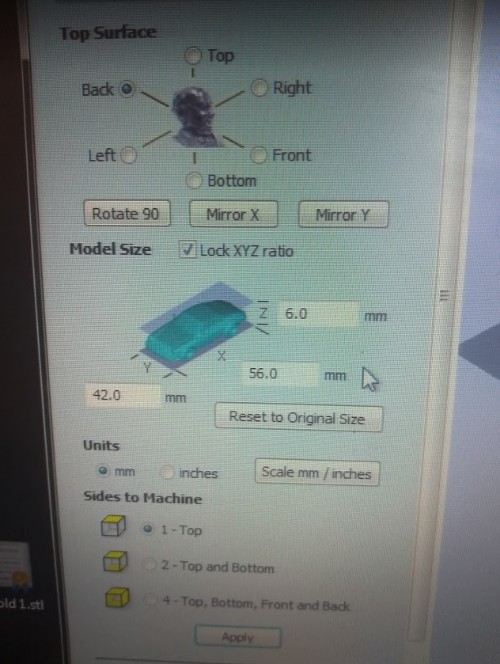
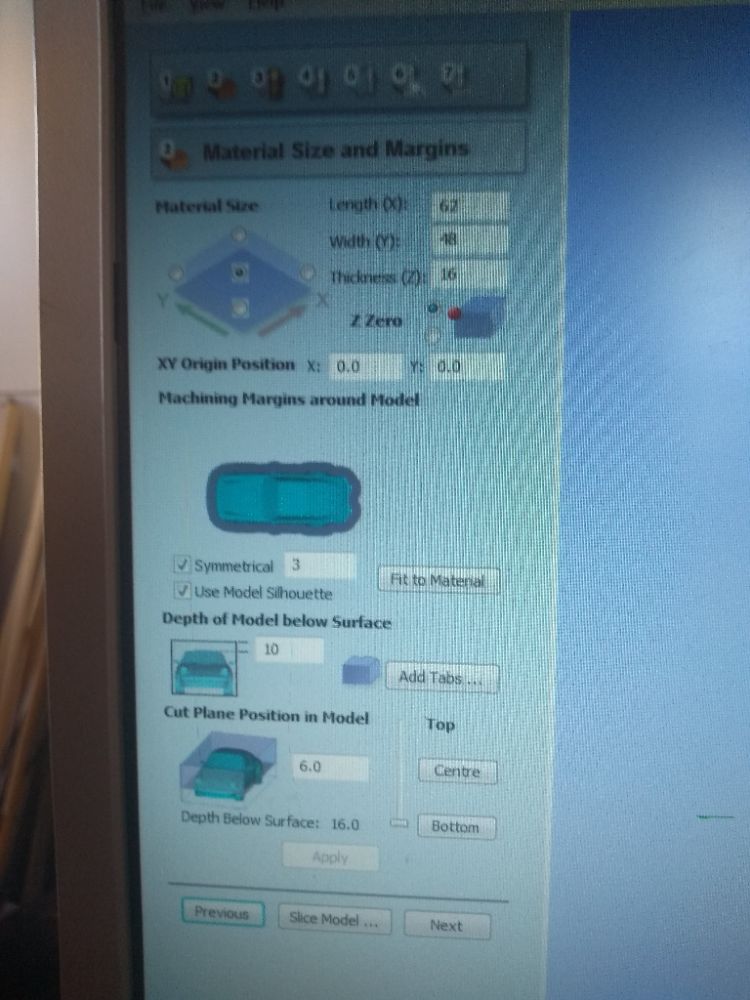
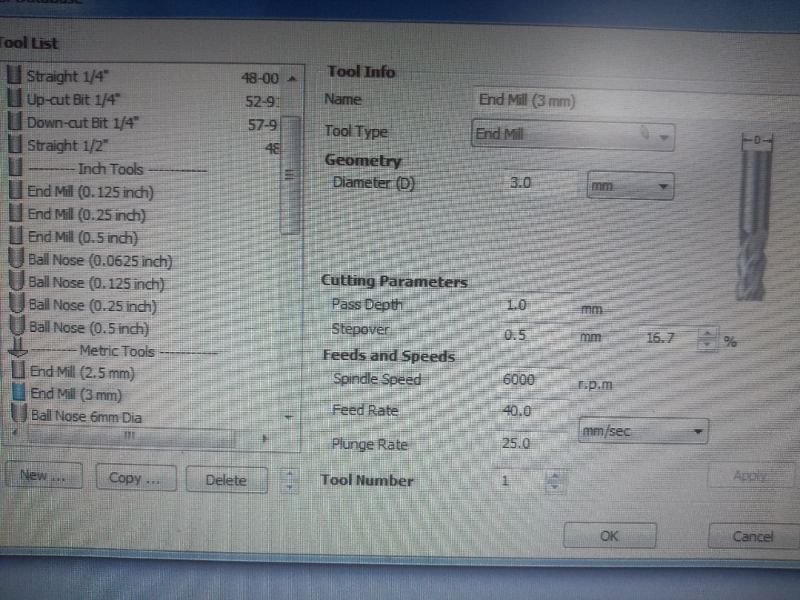
Preparing the file in Part Works 3D
The software that turns the 3D file into G-code is Part Works 3D and it runs on the computer associated with the Shop Bot.
Operating the Shop Bot
The operation of the Shop Bot is just as I described in week8. The only thing different was fixing the wax to the bed of the Shop Bot. The thickness of the block of wax will not let you screw it to the bed. I fixed the wax by screwing four pieces of wood to the bed so that it makes a square with the dimensions of the block of wax and thus holds it firmly and cannot move horizontally. Also I added double sided sticky tape to the block to keep it from moving vertically.
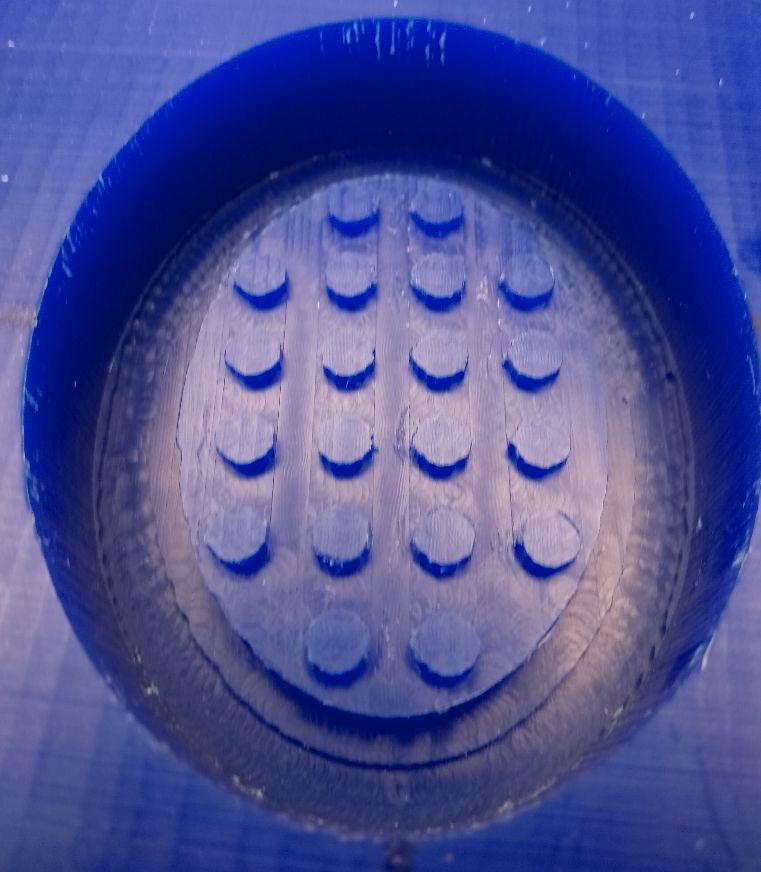
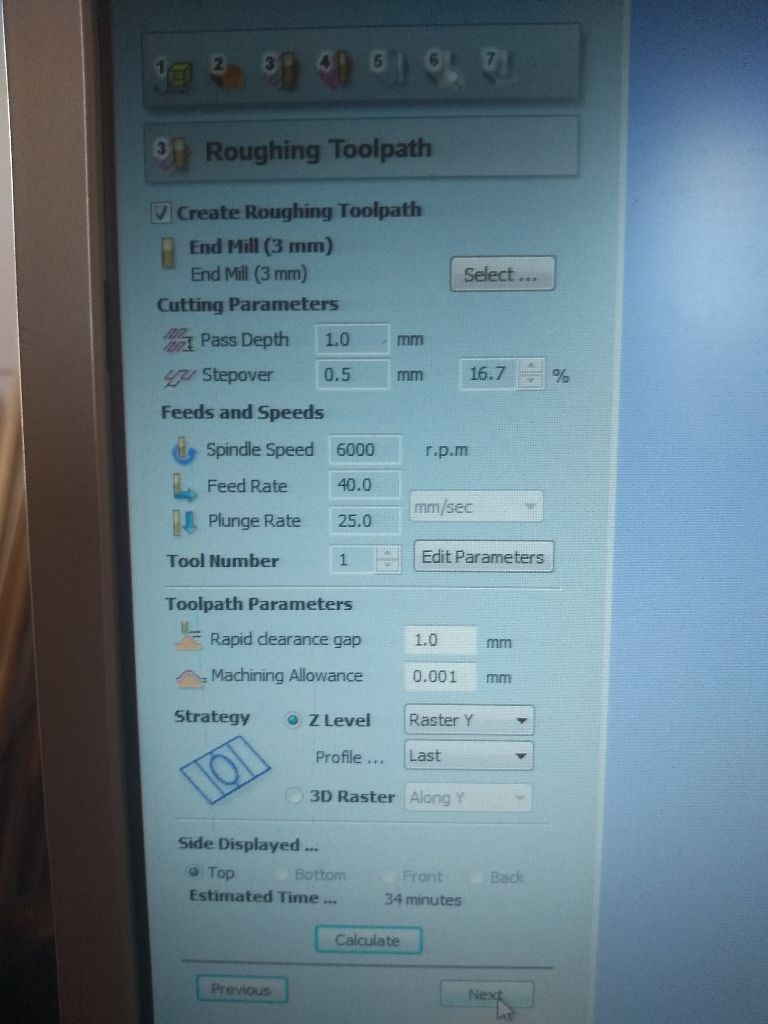
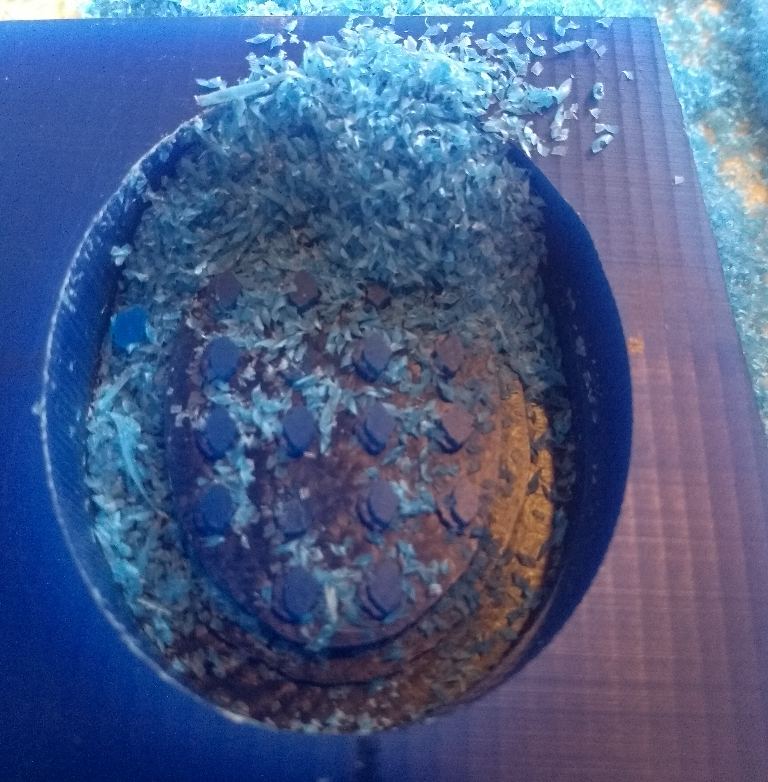
After 34 minutes the Shop Bot was done and the result was as shown in the left picture under here. This didn't look good. Two pins where knocked off and it looked as if the one layer had shifted on the Y-axis. We couldn't figure out what might have caused that. I might have been my phone attached to one of the USB-ports that made some sort of connection. The computer that runs the Shop Bot doesn't allow any programs running in the background. Also maybe I ran the program to fast. The only thing to do was to remove my phone and set the feed rate to 25mm/s. And to be sure I set machine allowence to 1 mm to perform a real finishing toolpath. Then I had another 80 minutes to go. To be extra super sure, at the start of the finisching toolpath, I changed the feed rate to 20 mm/s. The way to do tis is to press the space bar to stop the machine. The choose 'Enter Commands'. Then set the speed to what you want it to be. Press Enter, press Escape, Press Resume. After 10 more minutes, my design came out great.

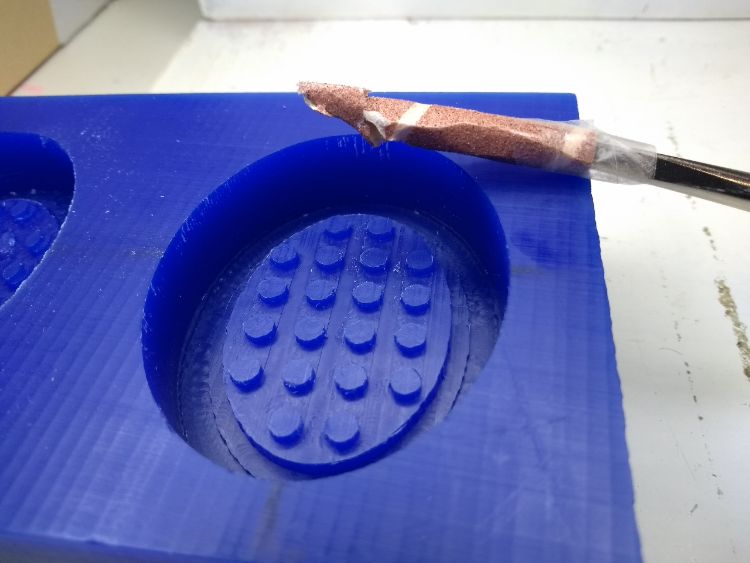
As you can see the pins are not perfect circles. I tried to file them a bit with a self made tool; a pin tool with P120 sanding paper wrapped around it. It made it a bit better. I tried to attach a lego brick on it and it worked!
Molding and casting
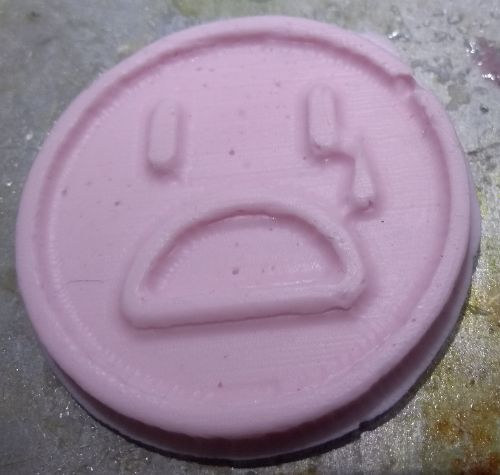
So now I have a mold for a mold. My final product has to be a flexible silicone. The mold has to be flexible too, otherwise I cannot get it unstuck from the hard wax molds mold. I decided to use Mold Max 30 for my final product. This is the corresponding safetysheet. I don't want to my mold to interfere with my final product. The productinformation for Mold Max 30 says that it is compatible with wax, gypsum, low melt alloys/metals and urethane, epoxy or polyester resins. For the mold I will use Vytaflex 50, a urethane rubber that is flexible. Here's the safetysheet. To be absolutely sure Mold Max 30 doesn't react with Vytaflex I decided to pour Mold Max 30 on the Vytaflex 50 test we ran on the Sad Candy design we made with Bas on thursday.
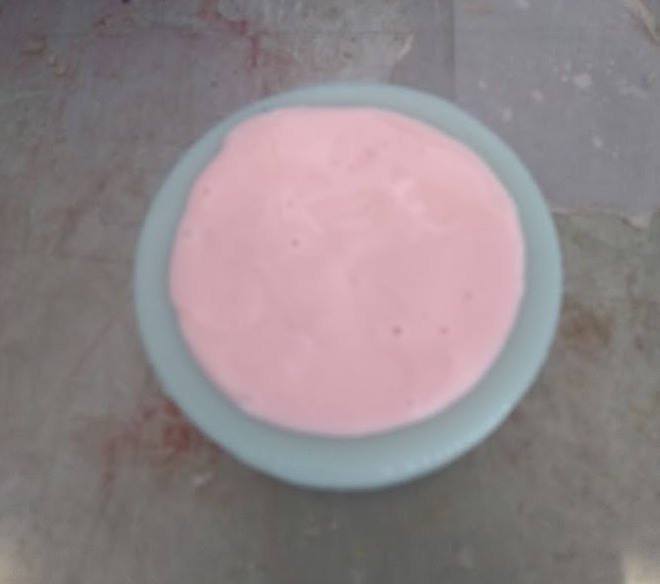
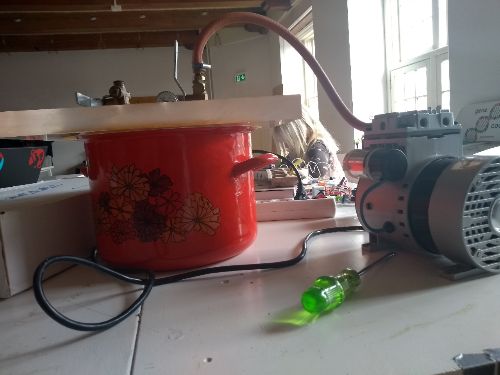
To pour the Mold Max 30, you need vinyl gloves, long sleeves, air ventilation. The product information also says safety glasses. I have to admit I didn't wear those. The pot containing the silcone rubber comes with a flask of curing liquid. The ratio to pour the two is 100:10. You should use a gram scale for this. The reason why it doesn't say 10:1 is probably because of accuracy. It does matter if you pour 10:2, it doensn't matter if you poor 100:11. The product information recommends vacuuming. I have no means of doing this for my mold, so I hope for the best.
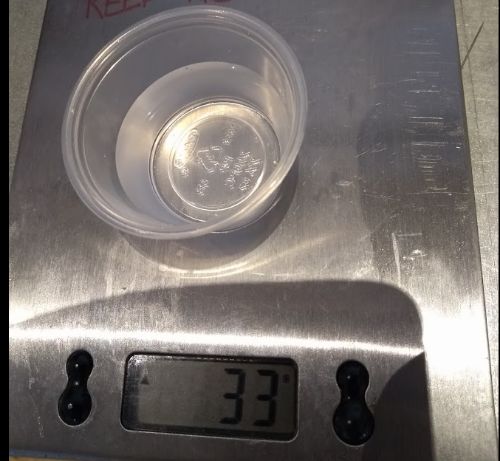
To pour the vytaflex 50 you also need gloves, long sleeves, safety glasses and air ventilation. The ratio to pour the rubber (Part A)with the curing liquid (Part B) is 1:1, either volume or weight. Both liquids should be stirred wel first. After this I made an estimation of the total amount of rubber needed for my mold. I filled my molds mold with water, poured it a cup an weighted the water on the scale. I measured 33 gram, which is 33 milliliter. The safetysheet of vytaflex says Part A has a Specific Gravity of 1.04. Part B has a SG of 1,05-1,25. Water at 4°C has a SG of 1. So Part A and B have a slightly higher density then water. To get the same volume of 33 grams of water, I need 1,04*33/2 = 17,15 grams of part A and 1,15*33/2 = 18,98 grams of part B. But as I need a ratio of 1:1 and both materials don't come fully of the pouring cup rims, I used 20 grams of Part A and 20 grams of Part B.

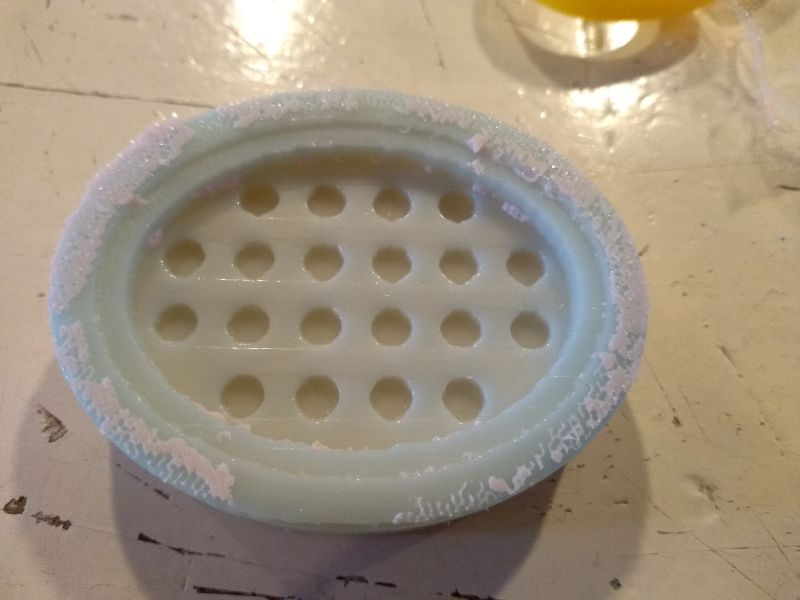
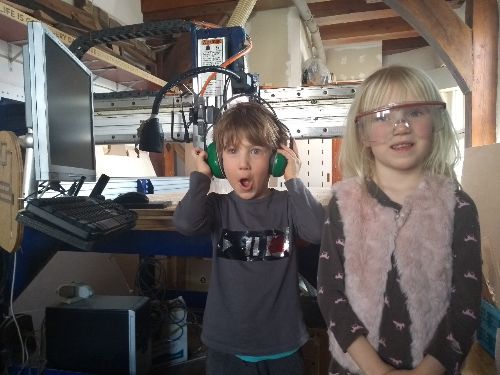
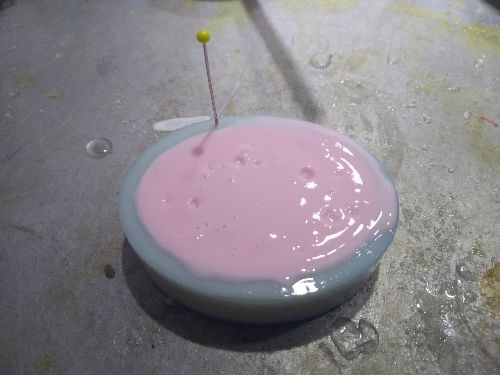
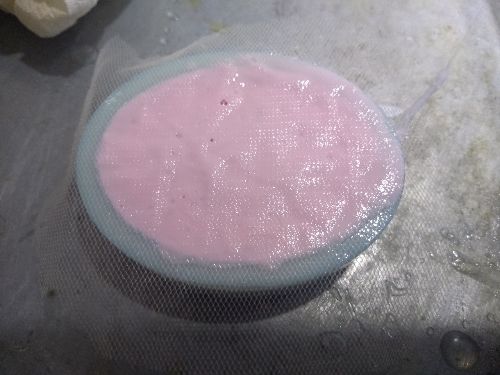
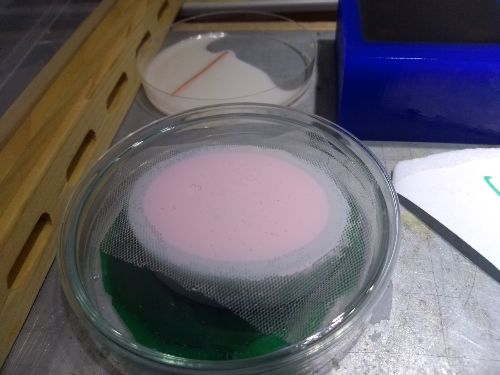
The next friday I took my kids to De Waag as they where free from school and my husband is abroad. The mold looked great. I used a screwdriver to get it out of the molds mold. Also I had a look at the silicone cast I made (Mold Max 30) on the Vytaflex test mold. It looked okay. There where some air bubbles though. So I decided to use the vaccum device that turned out to be available. I mixed the Mold Max 30 again as I did before, just guessing the volume I needed on eye sight. After casting it, I put the mold and casting in the vaccuum device. It really sucked out the bubbles visibly, but they did not seem to pop. After 4 minutes, I turned it off. Additionally I tried to pop the bubbles with a needle. That worked good for the bigger bubbles. The really tiny ones stayed where they where. Then I cut a piece of thule and layed it over the casting. I want to be able to sow it on fabric and I hope the fabric helps to prevent the silicone from tearing. Becuase I want the sewing surface to be flat, I placed the mold in a petri dish made of glass. I sprayed it with releasing spray before I did that. After this I poored another mold in my molds mold. Just to have two molds.
The result
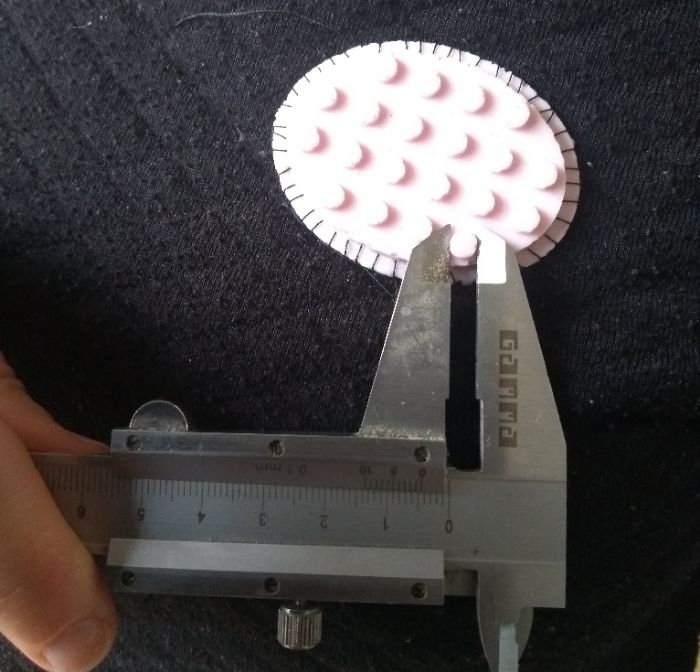
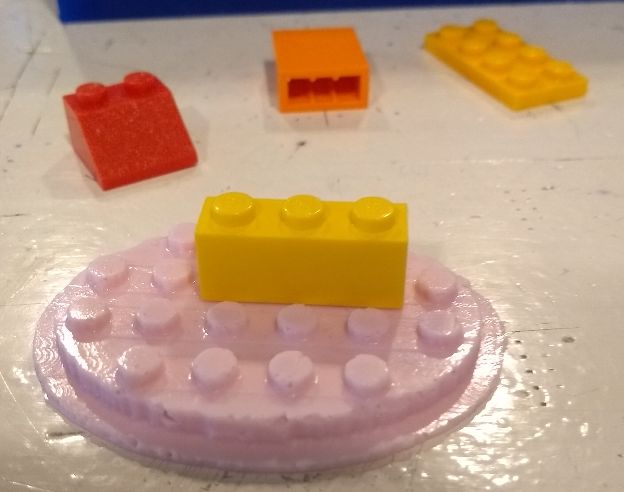
When I came back in the lab after the easter weekend, I checked the result. The top was really tightly stuck to the petri dish. I did spray releasing agent, but the product informations says that it needs 30 minuten drying time. And that I didn't do. The thule came in handy. It is really strong, didn't tear and helped me to release the patch from the glass of the pertri dish. Then I had to get the patch out of the mold. First I peeled the 1 mm outer layer and then simultaniously bended the rubber mold and the silicon patch. It came loose and lego fits on it! But not very tight, it falls off easily. You can see in the mold though that little pieces of silicone are stil stuck in the corners. Probably the releasing agent didn't quite get there, pressing again the importance of releasing agent. You can see on the patch that it misses pieces of silicon on the corresponding edges.
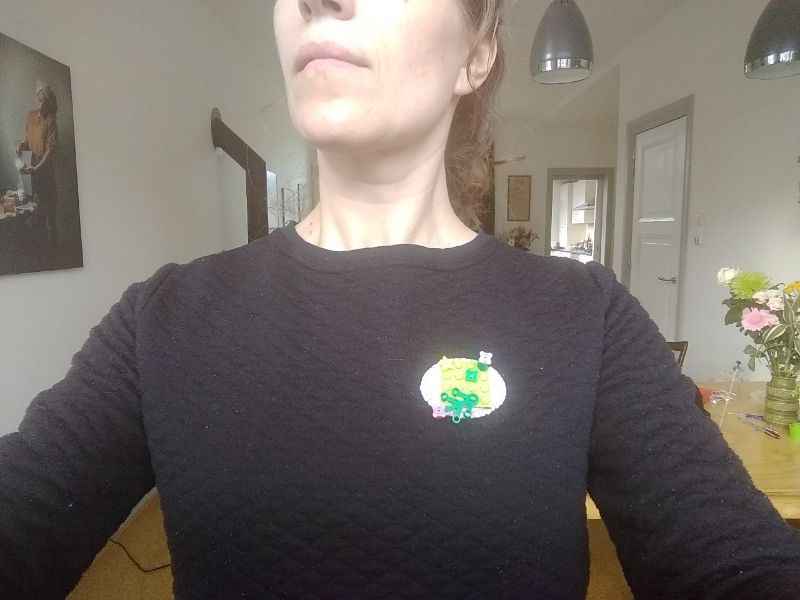
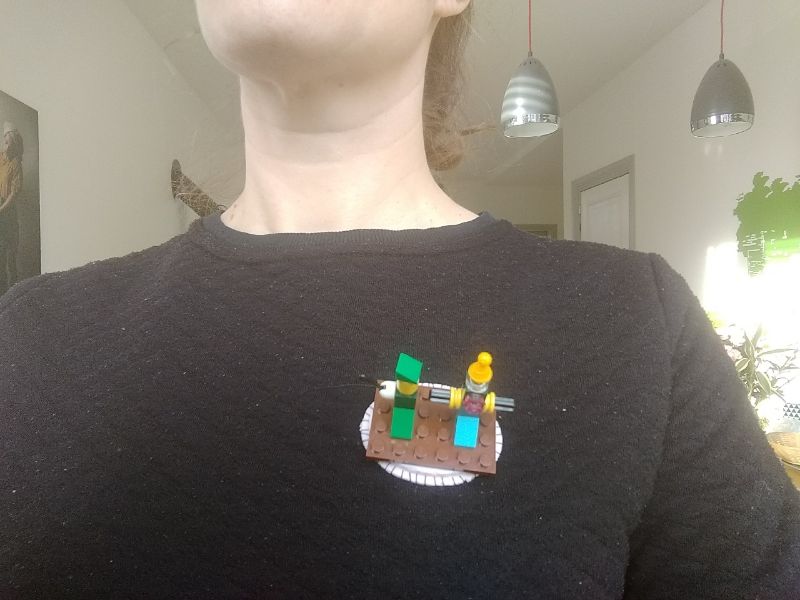
At home I sewed the patch to a sweater. I had to do it manualy. The press foot of my machine off course can't handle the height and the pins of the patch. Now I can wear my own Lego design. But I do have to sit still though.


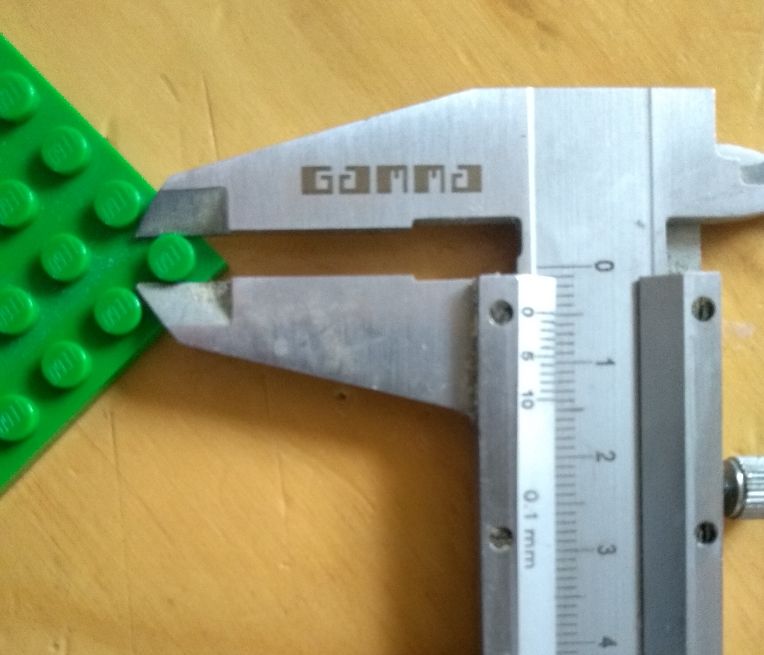
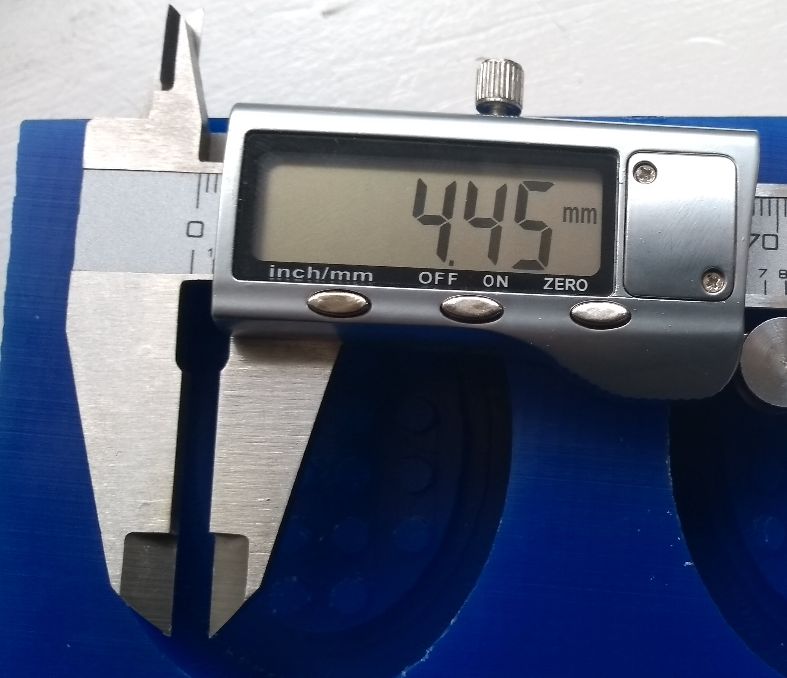
It is a big pitty that the lego falls off so easily. When I examine the sticky lego tape that you can buy, the material feels more firm. I measured the diameter of the actual lego pins, the pins of the lego tape and the pins of my lego patch and it looks like while the original lego and the lego tape have a diamter of 4,8 mm, my patch pins have a diameter of 4,5mm. Then I measured my mold and I found that those pins also have a diamter of 4,5 mm. Or in fact; depending from the angle with which you are measuring; the diamter is either around 4,8 mm or around 4,5mm. Something went wrong in the milling procedure. To fix this, I would have to mill my mold with the Parts Work 2D program, that gives more beautifull outlines. Or use a multitool with a 4,8mm straight mill and re-mill into the Vytaflex holes...